Modern Alfredo (Foolproof Compound Paste)

  • 100% Parmigiano (24 months aged)

  • 70% Butter

  • 25% Ice Water

  • 1.5% Sodium Citrate (Optional, recommended for texture)

  • 1.5% Lactose (Optional)

  • 1.0-2.0% Diluted I+G (Optional)

Steps

  1. Start by measuring the parmigiano cheese, and either chopping into small pieces or starting with the largest side of a box grater. All other ingredients are scaled to the mass of the cheese. This is also the point to measure and add any of the optional ingredients.

  2. Process the parmigiano and any optional ingredients in a food processor. Start with pulsing but then continue to run until you achieve the consistency of moderately fine breadcrumbs.

  3. Then introduce the butter, already in moderate sized pieces and chilled. Once again start by pulsing the food processor, and then running until the cheese and butter are evenly distributed.

  4. Lastly, measure some ice water and pour it into the food processor while running. Check to see that the water is incorporated into the mixture, and do some manual scraping and stirring. If necessary, continue to process until the mixture becomes a fairly smooth paste. It can be wrapped tightly in plastic wrap, and refrigerated for at least a week or frozen for several months.

Recommended usage is 60g Alfredo paste for every 100g portion of fresh pasta. Recommended usage is 70-75g Alfredo paste for every 100g portion of dried pasta. To prepare the Alfredo dish, prepare pasta according to the package, or boil for 1.5-2 minutes for fresh pasta. Transfer the cooked pasta into a relatively large mixing bowl, and start adding the premeasured Alfredo paste in several installments. Continue to stir and toss, adding pasta water as necessary to achieve your desired consistency. You can even temporarily place the mixing bowl on top of the pasta water vessel. The emulsified sauce should form easily, and should be served immediately in warm bowls, with additional parmigiano grated on top if desired.

This Alfredo paste also makes an excellent addition to other pasta dishes, for finishing risotto, and potentially even for soups/stews.

Flaming Hot Cheddar Slice

  • 100% Mild Cheddar (500g)

  • 50% Sharp Cheddar (250g)

  • 10% Parmigiano (50g) | +10% Sharp Cheddar, 1% MSG (+50g, 5.0g)

  • 60% Water (300g)

  • 6-12% Chili Flakes/Cayenne Pepper (30-60g)

  • 6% Sweet Paprika (30g)

  • 6% Sodium Citrate (30g)

  • 4% White Pepper (20g)

  • 4% Onion Powder (20g)

  • 4% Annatto Seeds (20g)

  • 2% Salt (10.0g)

  • 1% Diluted I+G (optional, 5.0g)

  • 0.4% Sodium Hexametaphosphate (2.0g)

The recipe is listed as a ratio in Baker’s percentages, and example measurements starting with 500g of mild cheddar.

  1. Measure the dry ingredients, setting aside any of them that are whole spices and may require additional grinding. Grind anything necessary into a relatively fine powder, before combining all of the dry ingredients together.

  2. Measure and grate all of the cheese on a standard box grater, the size is not important. Inside a large jar, or a separate mixing bowl, combine the cheese with the dry ingredients to thoroughly distribute.

  3. Place this mixture into a large glass jar, if it is not already in one. Measure the water, before placing into the jar.

  4. Place the jar into a sous vide water bath, set to 75-80°C (167-176°F). Give this at least one hour to begin melting.

  5. After that time, take the jar out of the water bath and quickly blend the contents with an immersion blender. It may take some time, but just continue to stir while blending, to ensure the mixture is as homogenous as possible. The mixture solidifies quickly, so it is best to place the jar back into the water bath for at least 30 minutes.

  6. Prepare 2 baking trays and two pieces of parchment paper,  lining one of the trays with one of the pieces. After the additional warming, quickly blend the mixture if necessary, otherwise immediately begin spreading the cheese mixture onto the prepared tray.

  7. Work quickly with a nonstick utensil, to spread the cheese mixture roughly even. Place the second piece of parchment on top of the cheese, and finally place the second tray on top of everything. Gently press down with the second tray.

  8. Let this sit at room temperature for at least three hours before transferring it to the refrigerator. You can check carefully to see when it fully solidifies, but it is easiest to leave it for 12 hours/overnight.

  9. Once solid, remove the top tray and parchment paper, before cutting into slices as necessary. Storage is easiest inside a plastic bag, with parchment paper separating individual pieces. Keep in the fridge for up to two weeks, or freeze for long-term storage.

The final product has the texture of American/processed cheese, but with a strong spicy/savory flavor and the background of actual cheddar flavor. Perfect for making mac & cheese with just the addition of butter and pasta water. It can also easily be turned into cheese sauce/dips without the addition of any starches or other stabilizers. Also great for burgers and sandwiches, really anything where you want melted cheese.

Clarified Fruit Acid

  • 100% Fresh Fruit (peaches, plums, cherries etc.)

  • 40-50% Water

  • 0.4% Pectinase

This technique is intended for fresh fruit like berries, stone fruit, perhaps certain types of apples. Really anything without too much inherent acidity, so the final flavor is easier to balance. Blend the fruit with water and the pectinase. Alternatively you can use a juicer before combining with water and enzyme. Water is added to dilute the sweetness, and making the filtering/extraction easier. The fruit juice/purée needs to be processed with either a centrifuge, or a series of filters. Without a centrifuge, it is best to let this mixture sit for a few hours at room temperature or overnight in the fridge. Filters can be a fine metal strainer followed by several layers of cheesecloth, or fine mesh food grade nylon.

  • 100% Clarified Juice

  • 5-6% Acid Powder (primarily Citric Acid, with some optional Malic Acid)

Measure the final yield of the clarified fruit juice and prepare the acid accordingly as a Baker’s percentage. Up to 6% citric acid on its own will create an acid profile similar to lemon juice. Whereas 4% citric acid and 2% malic acid creates a lime juice profile. Somewhere between those two numbers can also create an intermediate profile. The overall acid can also be reduced, if the original fruit juice is noticeably sour.

Whole Lemon Sorbetto

  • 110g Whole Lemon Slices

  • 40g Dextrose

  • 2.0g Turmeric Powder

  • 420g Cantaloupe

  • 100g Dextrose

  • 80g Lightly Toasted Sugar

  • 10g Lemon Peel

  • 10g Maltodextrin

  • 7.0g Salt

  • 2.5g Gum Arabic

  • 2.5g Xanthan Gum

  • 2.0g Lecithin

  • 220g Fresh Lemon Juice (from approximately 5-6 lemons)

  • 20g Neutral Oil

Target Sweetness: 20.0-21.0%

Estimated AFP: 370

  1. Prepare and measure slices of lemon, ignoring the very top and bottom, and collecting any juice that leaks out. Place directly in a small canning jar, along with the first measurement of dextrose, and the turmeric powder.

  2. Place this jar inside a pressure cooker with any necessary supports, and roughly half an inch of water. Pressure cook with the highest setting according to manufacturer instructions, for 30-35 minutes. Followed by letting the pressure release naturally.

  3. In the meantime, prepare the remaining ingredients. Measure and combine to the rest of the dry ingredients: second measure of dextrose, toasted sugar, maltodextrin, salt, and stabilizers; this mixture can also contain the lemon peel. Separately chop up and measure the cantaloupe. Freshly squeeze and collect the lemon juice. Lastly, measure and set aside the neutral oil.

  4. Once the pressure cooker can be safely opened, and the jar is cold enough to handle, it’s possible to proceed with the recipe. Empty the entire contents of the canning jar into the container of a high powered blender.

  5. Next add approximately half of the measured cantaloupe. Blend this mixture on high speed until completely smooth, at least 30 seconds. Follow this by the dry ingredients and remaining cantaloupe. Also blend this on high-speed until completely smooth, at least 45 seconds.

  6. Switch the blender to a moderate speed, with a pour spout open. While running, pour in the measured lemon juice. Then very slowly pour in the neutral oil. Give the mixture approximately 10 more seconds of blending on high speed before stopping.

  7. Transfer the sorbet mixture to an airtight container before refrigerating. Let the mixture rest for at least six hours but up to overnight.

  8. After resting, give the mixture one more blend, with the same blender or an immersion blender. Place it in the freezer to pre-chill for 30-40 minutes, followed by setting up your ice cream machine.

  9. Churn the sorbet according to the basic instructions of your machine, until it achieves a softserve consistency. Immediately transfer into an airtight container and place it in the freezer for a minimum of a few hours, ideally closer to 12 hours.

  10. This sorbet should be ready to serve directly out of the freezer.

2021-08-12.jpg
IMG_3777.JPG

Snack Cake Gelato

The recipe is slightly different depending on whether the snack cake you are using is vanilla (or similar) versus primarily chocolatey.

Gelato Steps

  1. Measure the dry ingredients: dextrose (130g for Vanilla, 120g for Chocolate), lightly toasted sugar or brown sugar (measurement based on the recipe calculator), salt and xanthan gum; before combining and setting aside. It’s recommended to use a precision scale for the salt and XG. Also measure the snack cakes and set aside separately.

  2. Measure the milk (also measure the cream for the vanilla version) before placing into a stainless steel or otherwise heatproof bowl. Place this liquid on top of a pot of simmering water, to create a double boiler.

    • Technically this could be done directly in a pot, if your stovetop gives you a lot of control. The double boiler is just added insurance.

  3. Stir the dairy mixture over the double boiler occasionally, for at least five minutes. If you have a thermometer, check the temperature. For this recipe the temperature can really be anywhere between 50-60°C (122-140°F). 

    • Without a thermometer, place a metal utensil into the dairy mixture for a few seconds, before removing it and very carefully touching it. The utensil should feel borderline uncomfortably warm, if not hotter.

  4. Once the temperature seems correct, add the dry ingredients somewhat gradually, while also stirring.

  5. Next add the snack cakes, breaking them by hand as you add them, or with a utensil in the bowl. (For the chocolate version, this is where you would measure and add to the 85% dark chocolate, ideally broken into small pieces.)

  6. Carefully remove the bowl from the double boiler. Blend the entire mixture very thoroughly, ideally with an immersion blender.

  7. Once smooth, detach the head of the immersion blender and leave it inside the bowl. In a separate larger bowl/pot, prepare a bath of ice and water.

  8. Place the bowl of gelato mixture into the ice bath, stirring every few minutes. If you have a thermometer, the temperature should be 25°C (77°F) or lower. 

    • Without a thermometer, directly taste some time should feel roughly room temperature or below.

  9. Reattach the immersion blender and blend one more time. After which, remove the blender and place plastic wrap directly against the gelato base. Place this in the refrigerator for 8-24 hours.

  10. After resting, give it one more blend before placing the gelato base directly into the freezer. Leave it in the freezer for 45-60 minutes, or until a thermometer reads 1°C (34°F) or slightly lower.

    • This is a key step included in all of the recipes in Gelato Obsession. Getting the temperature so cold before actually churning, makes the time in the machine much shorter. Less time churning, decreases the amount of air Incorporated, critical to the denser texture that gelato is known for.

  11. Churn the gelato according to the basic instructions of your machine, until it achieves a softserve consistency. Quickly chop up or break apart additional snack cakes, before briefly folding in by hand. 

  12. Immediately transfer into an airtight container and place it in the freezer for a minimum of a few hours, ideally closer to 12 hours.

  13. This gelato should be ready to serve directly out of the freezer.

Caramelized Sugar Table (Reference)

This is an excerpt from my book, but I will also use these types of caramelized sugar for other recipes. Feel free to use this table as reference for your own cooking, as a way to partially standardize different forms of caramelized sugar.

caramelized sugar table.PNG

Rhubarb Char Siu Sauce

Full credit and inspiration goes to the great YouTube channel Chinese Cooking Demystified. They obviously have a great video about this recipe, but I used their detailed written recipe as my primary inspiration for this recipe.

Part 1 - Aromatic Broth/Lushui (卤水)

  • 150g Rhubarb

  • 150g Onions

  • 75g Ginger

  • 180mL Soy Sauce 

  • 180mL Cooking Wine 

  • 1.8L Water

  • 20g Cinnamon Bark

  • 16-17g Star Anise (about 18-20 individual pieces)

  • 15g Green Cardamom

  • 15g Paprika

  • 10g Dried Orange Peel

  • 1.6-1.8g Cloves

Quickly fry aromatic vegetables in a small amount of oil, just 60 seconds. Deglaze with cooking wine, followed by soy sauce and water. Add spices and gently simmer for 45-90 minutes. Strain the liquid and measure the final yield, before cooling and transferring into a storage container. Refrigerate until needed

Part 2 - Char Siu Sauce

  • 100% Aromatic Broth (previous mixture)

  • 40% White Sugar

  • 25% Red Miso (other homemade/artisan miso, if available)

  • 15% Red Fermented Tofu/Liquid

  • 10% Muscavado Sugar

  • 10% Dextrose

  • 20-40% Roasted Rhubarb

  • 1% Gum Arabic

All ingredients for this next step are in a Baker’s percentage, based on the weight of the Aromatic Broth from Part 1. Start by measuring the rhubarb, 40% by weight based on the quantity of Aromatic Broth. Drizzle with a small amount of oil and roast in a 375°F oven. Checking every 5-10 minutes until soft and slightly colored, before setting aside. 

Measure and combine the remaining ingredients, including the stock, into a medium-sized pot. Bring to a simmer and stir to dissolve the various sugars, continuing until it reduces just slightly (only by 10-20%).

Take the sauce off of the heat and add roughly half of the rhubarb, before blending thoroughly. Taste and add more rhubarb if desired, blending as necessary. Transfer into a clean jar, before cooling and refrigerating.

Mortadella Calculator

I am still mastering the techniques of making emulsified sausage and other charcuterie, but I thought I would post this tool for anyone interested in making mortadella. This is based on several other recipes, but allows you to scale it down to a very small batch, or unusual amounts if you are butchering larger pieces of pork to go into the sausage.

Simply input the amount of lean pork you have (in grams) and it will give you all of the other measurements necessary. The amount of fat directly ground into the sausage should be as close as possible to the number given in the table. For the amount of fat pieces incorporated later, I give two options depending on how fatty you would like the product. The only measurements to take note of are the Salt and Curing Salt #1. You should use the smaller or larger amount of these ingredients listed in the table, proportional to if you are using more or less fat chunks. Otherwise the spices/flavorings can be used with less precision if you prefer, but the table does provide recommended ranges for measurements.

Mortadella Formula

Ingredient % Measurement (g)

Making the Ultimate Fruit Syrup: A Step-By-Step Guide

I have developed this technique over about a year, it is absolutely insane and no reasonable human would go through the trouble I do to make syrup. In this guide there are several optional shortcuts that will make the entire process much easier. However, if you do choose to go for the maximum effort version, you will be rewarded with a delicious, intense, honey-like syrup that tastes like fresh fruit.

  1. Obtain fruit juice. (I would recommend a minimum of 2L, but preferably more like 4-5L for a worthwhile yield of syrup.)

    1. The easy option is of course to buy fruit juice. I have done this technique with store-bought apple juice, and orange juice. I have also done this technique with a mixture of store-bought and fresh juice. Obviously slightly better results would come from juice that you could buy freshly pressed, but that might be expensive.

    2. The harder version is of course to make your own fruit juice. There are a few primary advantages to this. Firstly, it allows you to make a syrup out of a fruit that may not be commonly available as a store-bought juice. Secondly the juice will of course be much fresher than anything you can buy in a store, although completely avoiding oxidation is essentially impossible. Be careful if adding anything like ascorbic acid/vitamin C to your fruit during juicing, since it will be significantly concentrated in the following steps.

  2. Clarify your fruit juice. Clarifying is an important step in this procedure, it will remove pectin as well as any very small particles of sediment/pulp. Removing pectin is important because after concentration we want a thick, but free-flowing, syrup. Pectin can also inhibit some flavors and clarified juices tend to taste brighter. For this you will need some form of pectinase enzyme at a minimum, for citrus such as grapefruits you may also need additional clarification agents. With grapefruit in particular there are some additional steps you can take to ensure that the juice is not overly bitter. For more information please check out Dave Arnold’s website for information on agar clarification Also note that for certain fruits such as apples, it may be helpful to use a pectinase before juicing to increase your yields. But afterward you will still need to filter/separate your juice.

    1. The easiest way to actually filter/separate your clarified juice from the particulates is time. After adding pectin and in the other clarification agents, simply let your juice sit at room temperature for several hours or in the fridge overnight, and skim off clear juice from the top. If foam develops, you may need a syringe or similar device to extract clear juice from the middle of your container.

    2. A significantly faster option is the previously mentioned agar clarification, which is not only highly recommended for something like grapefruit juice but can also speed up the process with any juice. The downside of course is that it requires agar, a food grade nylon filtering bag (or something similar), and may result in a lower yield.

    3. Now the easiest option in terms of effort is actually the most difficult option in terms of cost and equipment. Clarifying juice is extremely easy if you happen to have access to a centrifuge such as the Spinzall. If you do happen to have access to one, it might be easiest to combine juicing and clarification into a single process. Especially for soft fruits such as berries.

  3. Adjust the sugar content of your juice. You will need a hydrometer or a refractometer to determine the sugar content a.k.a. the Brix of your clarified juice. I then recommend you add some amount of plain white sugar, as this will increase your overall yield. The easiest way to determine how much sugar to add is with an online calculator used in homemade wine making.

    1. The next step is concentration so you can make that significantly easier if you add a good amount of sugar. Theoretically you could add enough sugar for your juice to be 50 Brix, then you have simple syrup that could remain in the fridge and be done.

    2. My preference is to increase the sugar content of the juice to 20 Brix. This slightly  increases my yields since most juices are between 10-15 Brix, but it also makes it easy to calculate my final yield after concentration.

  4. Concentrate your juice mixture. The degree of concentration will entirely depend on how much sugar you added, and what your target concentration is. For something that will last several weeks in the fridge, and be readily usable for cocktails, I would go for 50 Brix  as a minimum. My preference for a final concentration is roughly 80 Brix, which will behave more like honey. I’m not a food safety expert and I encourage you to do your own research, but in my experience, syrups at 80+ Brix are very shelfstable.

    1. The easiest way to concentrate your syrup is of course boiling it down. Once you have a mixture that reaches 108-112°C, you should be at between 80-85% sugar based on candy making procedures. If your target concentration is lower than that, it may be difficult to determine when you are done based on temperature. While relatively fast, the disadvantage of this process is that it introduces cooked fruit flavors. Depending on your planned uses, this might not be an issue. As an additional precaution for preservation, you can put the syrup resulting from boiling through a standard jam/jellies canning procedure.

    2. My preference for evaporation takes significantly longer. I generally evaporate my syrup slowly using sous vide. The fruit juice mixture is in an open tray/basin resting inside a larger basin with the water and immersion circulator. I usually have my circulator set to 62°C, although depending on your setup  it may need to be a bit warmer. You want the mixture itself to be at 60°C minimum, this will prevent unwanted fermentation or spoilage. At this temperature the mixture evaporates very slowly. Going from a 20 Brix all the way to 80 Brix takes around 24-36 hours total. The advantage of this technique is that the final syrup has a flavor much closer to the fresh fruit juice, rather than a cooked jam or preserve. Of course if you’re not super concerned about preserving a fresh flavor, you can also evaporate sous vide but at a slightly higher temperature.

  5. Enjoy your fruit syrup! Depending on what choices you made you should have a decent yield. When going from 20 Brix to 80 Brix, you should get 250g of final syrup for every 1 kg of starting mixture. If your target concentration and added sugar are different, you will need to recalculate your estimated final product. I find measuring the mass of the final syrup is a good way to determine when I’m done, since my sugar measuring instruments don’t work at high concentrations.

Charred Cheddar + Sharp Cheddar Marbled Cheese Slice

Video Recipe: https://youtu.be/Qv-mNyOwMe0

Ingredients

  • 300g Mild Cheddar

  • 40g Butter

  • 30g Milk Powder

  • 125mL or half a cup Smoked Water (or regular water)

  • 10g Sodium Citrate

  • 300g Sharp Cheddar

  • 40g Butter

  • 125 mL or half a cup Water

  • 9g Sodium Citrate

Equipment: immersion circulator, immersion blender (or other powerful blender), heat gun, oven/toaster oven.

To create my marbled cheese slice you are first going to need to broil/char your mild cheddar. To ensure that the consistency of the final mixture isn’t too thick, take only 200g of the mild cheddar and mix it with the milk powder and first portion of butter. Both the butter and the cheese should be in reasonably small cubes, with the mixture on a foil or parchment lined tray. Make sure your  lining has some walls to it because this mixture is going to liquefy. Broil in a oven/toaster oven at a relatively high temperature, around 400°F. The timing for this is going to entirely depend on how brown/charred you want your cheese, so just keep an eye on it. Once you’re happy with the look and aroma, transfer the charred cheddar mixture into a jar. You can then add the remaining 100g of mild cheddar, the 125mL of water or smoked water, and the 10g of sodium citrate. If you charred your cheese very thoroughly you may want to add an additional 30-45mL of your liquid to compensate for the moisture loss. Also if you are comfortable working with liquid smoke you can use a few drops of that in place of smoked water. (Smoked water is simply made by exposing a tray of water to smoke for a few hours and then filtering it.)

Once all of that is in a jar you can then prepare your sharp cheddar mixture. This is simply the entire 300g of sharp cheddar into relatively small cubes, with the remaining butter, water, and sodium citrate. Each in their own jars, the cheese mixtures should be placed in a 75°C immersion circulator. Heat them for between 45-60 minutes or until they look thoroughly melted. You could attempt to do this on a stove, but you would have to be careful of evaporation and it would be difficult to get both cheese mixtures at the same temperature simultaneously. Once everything is melted, it’s time to blend the mixtures until completely smooth. I recommend an immersion blender because transferring the cheese mixture between multiple containers can cool it down to quickly. I also recommend blending the sharp cheddar mixture first  so the color of the charred cheddar doesn’t contaminate it. After you blend each mixture, quickly transfer them into Ziploc bags and place them back in the circulator to stay warm while preparing everything else.

Now it’s time to pipe out the cheese, I recommend a large sheet tray with a silicone mat or parchment paper. You should also have a heat gun or powerful blow dryer standing by. The exact marbling pattern is going to be up to you. For my first attempt, I piped the cheese mixtures separately as partially overlapping blobs. I then relied on gravity, tilting/dropping the tray, and the heat gun to spread out and blend the two types of cheese. This resulted in a very distinct and large marbling pattern that I was very happy with. However, I would definitely pipe the cheeses out simultaneously next time, and make the pattern a bit smaller. Once you’re happy that the mixture is melded and level, you should place parchment paper on top  and an additional sheet tray to keep things nice and flat. I then let the cheese slices solidify overnight. Once everything is solid you can slice into the desired shapes and use!

Culturing Meat with Koji Sous Vide: A Step-By-Step Guide

Disclaimer: I am not a microbiologist or food safety expert. All of these procedures are based on research I have done myself and experiments that have worked successfully for me. You can attempt a procedure like this at your own risk. That being said, the reason I personally feel comfortable fermenting meats in this way is that spoilage bacteria is predominantly on the surface of meat. So when treated correctly I am confident that Koji, which is a beneficial fungus, can essentially completely take over the microbial landscape in the timescale of these projects. However, it would be beneficial to do your own research on the topic of more conventional charcuterie/meat fermentation as well as dry aging at home.


Video Tutorial. For Koji fermented meats I put things into two broad categories, Koji aging and Koji charcuterie. Koji Aging is when whole pieces of fresh meat are cultured with Koji for a relatively short period of time (on the scale of days) before being cooked and eaten. In the context of beef this is meant to somewhat replicate dry aging, although it can be done to essentially any type of meat. Koji Charcuterie is when a standard cured meat procedure has a Koji fermentation step added. Many types of charcuterie already involve fermentation, which generally involves purposefully adding a bacterial or fungal culture to the meat (salami as an example). For this type of charcuterie I would say the Koji would be replacing the standard cultures that are traditionally used. In the case of cured meat that isn’t intentionally fermented (although many forms of cured meat rely on the growth of certain beneficial molds spontaneously) a Koji fermentation Step would be added after curing but before aging.


  1. Find a source of Koji. This can be as simple as buying spores online, which you can use directly on meat. However, my preferred method is to grow the spores on some sort of substrate, like rice or grains for at least 24 hours. And then use those Koji substances to inoculate your meat. If you’ve never done that before, I also have a written tutorial for that procedure.

  2. Prepare your meat.

    1. In the case of Koji charcuterie this means following a standard recipe, including using the appropriate amount of normal and curing salts, up until the point where other cultures are introduced and/or the meat is aged.

    2. For Koji aging you want to take your meat and still lightly cure it in a mixture of equal parts salt and sugar by weight. You want enough mixture to completely bury your meat, and this is done based on time. The goal is not to thoroughly or precisely season the meat, but simply expose the surface tissue to some intense salt and sugar. This will temporarily kill or inhibit other microbes, giving Koji time to take over. The amount of time needed is going to depend on the size and surface area you are working with, but in general I would say between 10 to 20 minutes is a good range. After the curing time is done you want to thoroughly rinse off any excess salt and sugar, but don’t worry about drying it off.

  3. Coat your meat in rice flour. No matter what style of Koji meat you are making you want to thoroughly coat the pieces in rice flour, and it can be helpful if your product is still slightly damp from any type of curing procedure. In a pinch you can also use regular wheat flour, but rice flour is my preference. I prefer the way it acts as a coating when cooking the final product.

  4. Inoculate your meat. As I mentioned earlier in this guide, my preference is using Koji fermented rice or grains as the source for inoculation. In doing this, simply spread your Koji fermented substance on top and around your pieces of meat that have been covered in rice flour. The easiest way to do this would probably be a gloved hand. If using spores directly, you want to dilute them in about a cup of rice flour and simply apply a second layer of this flour/spore mixture.

  5. Incubate your meat. Of course my preference is an immersion circulator in a large hotel pan or basin. Your water temperature should be set between 30-33 Celsius and all of your meat should be placed in inserts, pots, or trays that fit comfortably inside the water or just above it (without letting water directly in of course). Each tray or container should be individually wrapped in foil to keep in warmth  and then the entire sous vide setup should also be wrapped in foil. It’s also important that you do not crowd your pieces of meat, if possible don’t have them overlap at all.

  6. Incubate for a total of 48-72 hours. In general I find it only takes 24 hours for some noticeable fungal growth and the generally after 48 hours things are thoroughly fuzzy and ready to stop incubating. It’s a good habit to check on them once or twice a day during the incubation period. You can also add some extra rice flour to spots if some  falls off.

  7. Congratulations! Your Koji fermented meat is now done.

    1. For Koji aging I would let it sit in the fridge on a tray with plenty of air circulation for at least a day. It will also continue to very slowly age in the fridge like this for several days. When cooking meat fermented with Koji, it’s important to note that it’s going to be significantly more tender so you may need to reduce cooking times, especially for things like tough cut. Remember that your product has already been lightly cured, so it probably doesn’t need much seasoning. And be aware that Koji fermented meat develops a very dark crust from searing much more quickly than normal meat. Flavor outcomes are going to depend on a wide number of variables but you will frequently get notes of other Koji products like miso and soy sauce, but there’s plenty of room for more complexity and experimentation.

    2. For Koji charcuterie it’s now time to age your product. Ideal conditions will depend on what you are making, obviously consult whichever recipe you are using for ideal temperature and humidity for aging. However, I will say anecdotally I have had success aging Koji based charcuterie in nonideal conditions (a cool part of my basement but no environmental control). If the goal of your charcuterie is a certain level of moisture loss I would check it fairly frequently. Koji tends to accelerate the aging process, sometimes quite significantly. Flavor wise, again there’s going to be a lot of variables. In my limited experience I would say the Koji adds distinct flavors when the charcuterie is on the smaller side, such as pork belly. Whereas with larger products like prosciutto, the impact is mainly in aging acceleration and not as much adding a distinct flavor.

Culturing Koji Rice Sous vide: A Step-By-Step Guide

This is a written companion to a video tutorial I made for my preferred method of culturing  Koji Rice in an immersion circulator. The video contains a little bit of additional background information and troubleshooting, but this written guide should also be fully instructive on its own. This is by no means the only method for growing Koji at home, but it is my preference due to the level of temperature control.

  1. Buy koji spores, they are easy enough to source online. There are multiple strains available, so buy one that closely matches the rice and final product you intend to make.

  2. Soak your rice, preferably overnight, and if using a short or medium grain rice (such as glutinous rice or sushi rice) also thoroughly rinse the rice until there is no trace of exterior starch. The package of spores you buy should recommend the amount of rice to cook.

  3. Steam your rice in small batches until slightly undercooked/al dente. The goal is fluffy and slightly chewy rice that doesn’t stick together. Even if you have a rice cooker that works well, it may not allow you the control to get the correct texture for koji.

  4. Cool down the rice as each batch is completed. I recommend spreading it out onto trays as thinly as possible.

  5. Once the rice has cooled down completely, you can sprinkle over your koji spores. If it’s easier you can also dilute the spores with rice flour so they are easier to distribute.

  6. Now you can put the rice into one or two containers that will fit inside your sous vide basin. I use a standard hotel pan/steam table as my basin and a 6 inch deep half-size insert for my koji rice. If you are using this exact set up, I would not make more than about 2 kg of rice, because you don’t want the layer of rice to be too thick. In addition to standard sized inserts, any stainless steel pot/container that you can stably float inside your sous vide setup should work.

  7. Ideal incubation temperatures for koji are between 28 and 32 Celsius. I was using a Joule immersion circulator and I found that my insert was fairly consistently 2°C below the water temperature. In which case I could have set my water temperature anywhere between 30-33°C to stay comfortably within ideal temperatures. If you are using a different immersion circulator, I recommend filling the containers you intend incubating the rice in with water and placing them inside an active circulator. You can then determine the approximate temperature difference between your circulator and containers floating in the water.

  8. Once your containers of rice are secure, you want to cover them individually with foil and then cover your entire set up in foil to prevent evaporation.

  9. You generally want to let the rice incubate for a total of 48 hours, but twice a day (ideally every 12 hours) you want to gently stir and mix the rice. This can be done either with a clean wooden spoon or gloved hands. If you’re making a large quantity of rice, it may be beneficial to spread the rice out onto some extra trays during the mixing.

  10. After the full 48 hours you should have koji rice ready to use. As early as 24 hours into the incubation, you should notice a sweet pleasant smell and some noticeable fungal filaments in between the rice. The final fermented rice may have some white fuzz on it, which is completely normal. Even some traces of green mold aren’t overly concerning, Koji changes from white to green when it’s getting ready to emit spores.

  11. Congratulations! You now have Koji Rice ready to be turned into a variety of products. You can make miso, shio Koji, sake, or more modern preparations such as koji assisted aging of meat, or various amino sauces and pastes. Specific procedures for all of those will come at a later date.

Sous Vide Confit Technique - Stewing Chicken

Recipe Video - https://www.youtube.com/watch?v=2a0fbPQBB_c

Ingredients

  • Stewing Chicken (or other tough meet)

  • Salt

  • Curing Salt #1

  • Oil

  • (Optional) bacon fat, beef tallow, or other flavorful drippings

  • Herbs and Aromatics

Equipment: immersion circulator, hotel pan/steam table, half-size hotel pan to insert.

Traditional confit was a preservation technique that involved curing meats before gently poaching them in fat. This product was then generally stored covered in a layer of fat. Now this isn’t necessary, thanks to refrigeration, but the cooking technique has persisted. It actually has quite a few similarities with modern sous vide cooking. Firstly, it’s done at a relatively low temperature usually. Secondly, poaching in fat as a medium doesn’t dilute flavor nearly as much  as poaching in water (although it still does a little bit, and we’ll get to that). And this is of course similar to some of the advantages of cooking inside a vacuum bag. There are many traditional but more recent confit recipes that aren’t really cured, just well seasoned. There’s also a number of sous vide confit recipes that rely on an immersion circulator for temperature control but simply put a small amount of fat inside the cooking bag. That doesn’t really make sense to me unless   you’re using the fat to create a better seal with a Ziploc bag instead of a vacuum bag.

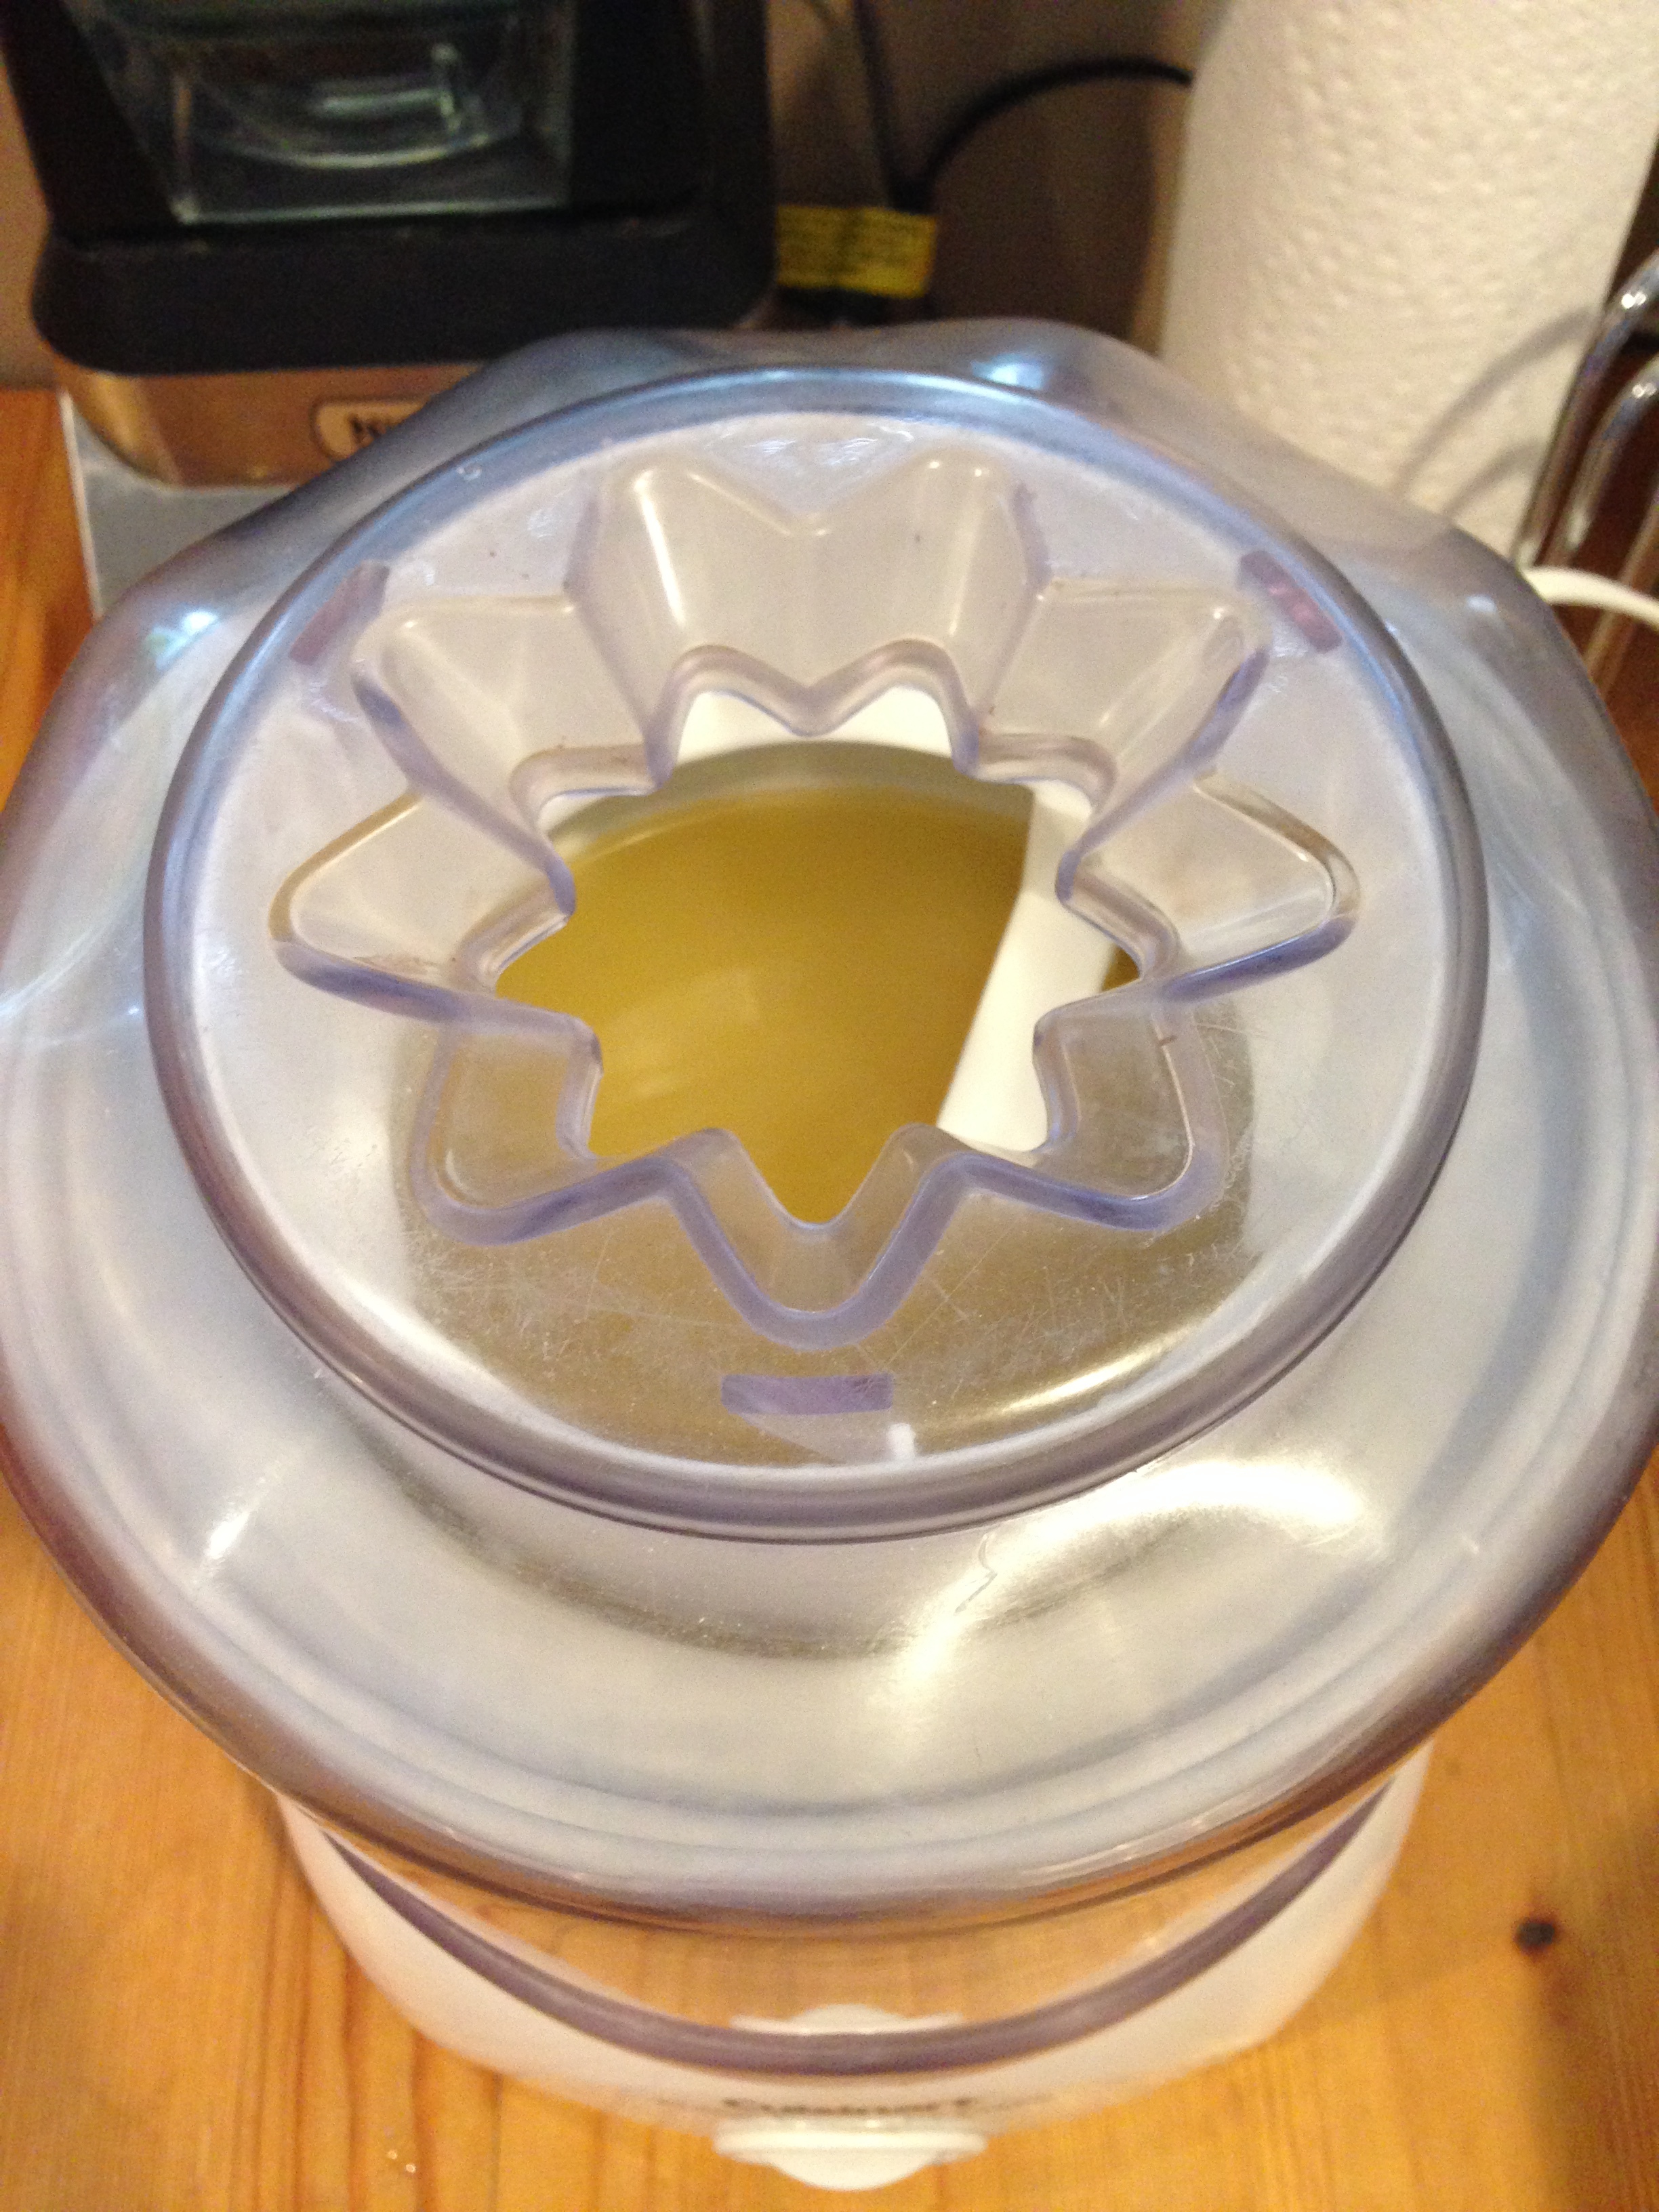
My preferred confit technique is a real hybrid of super traditional technique and modern equipment. I like to do a light cure and use a large amount of fat/oil, relying on my immersion for temperature control. Very fancy restaurant quality circulators can actually work directly inside oil, but any model designed for home use isn’t going to have that kind of functionality. My workaround for this is pretty simple. My circulator is inside a full-size hotel pan/steam table and my oil is in a 4 inch deep, half-size insert. The exact depth isn’t super important but I wouldn’t go much shallower than that. Also, both of my pans are stainless steel. Many sous vide enthusiasts have a large pan or basin that is plastic, which makes sense because it’s a better insulator. However, I do prefer metal for the insert since I actually want thermal conductivity. In testing this recipe I was using the Joule circulator, and I found that the material or liquid inside my insert was pretty consistently 2°C below the water temperature of my circulator. If your setup is significantly different, you should run a test to see what the temperature difference is.

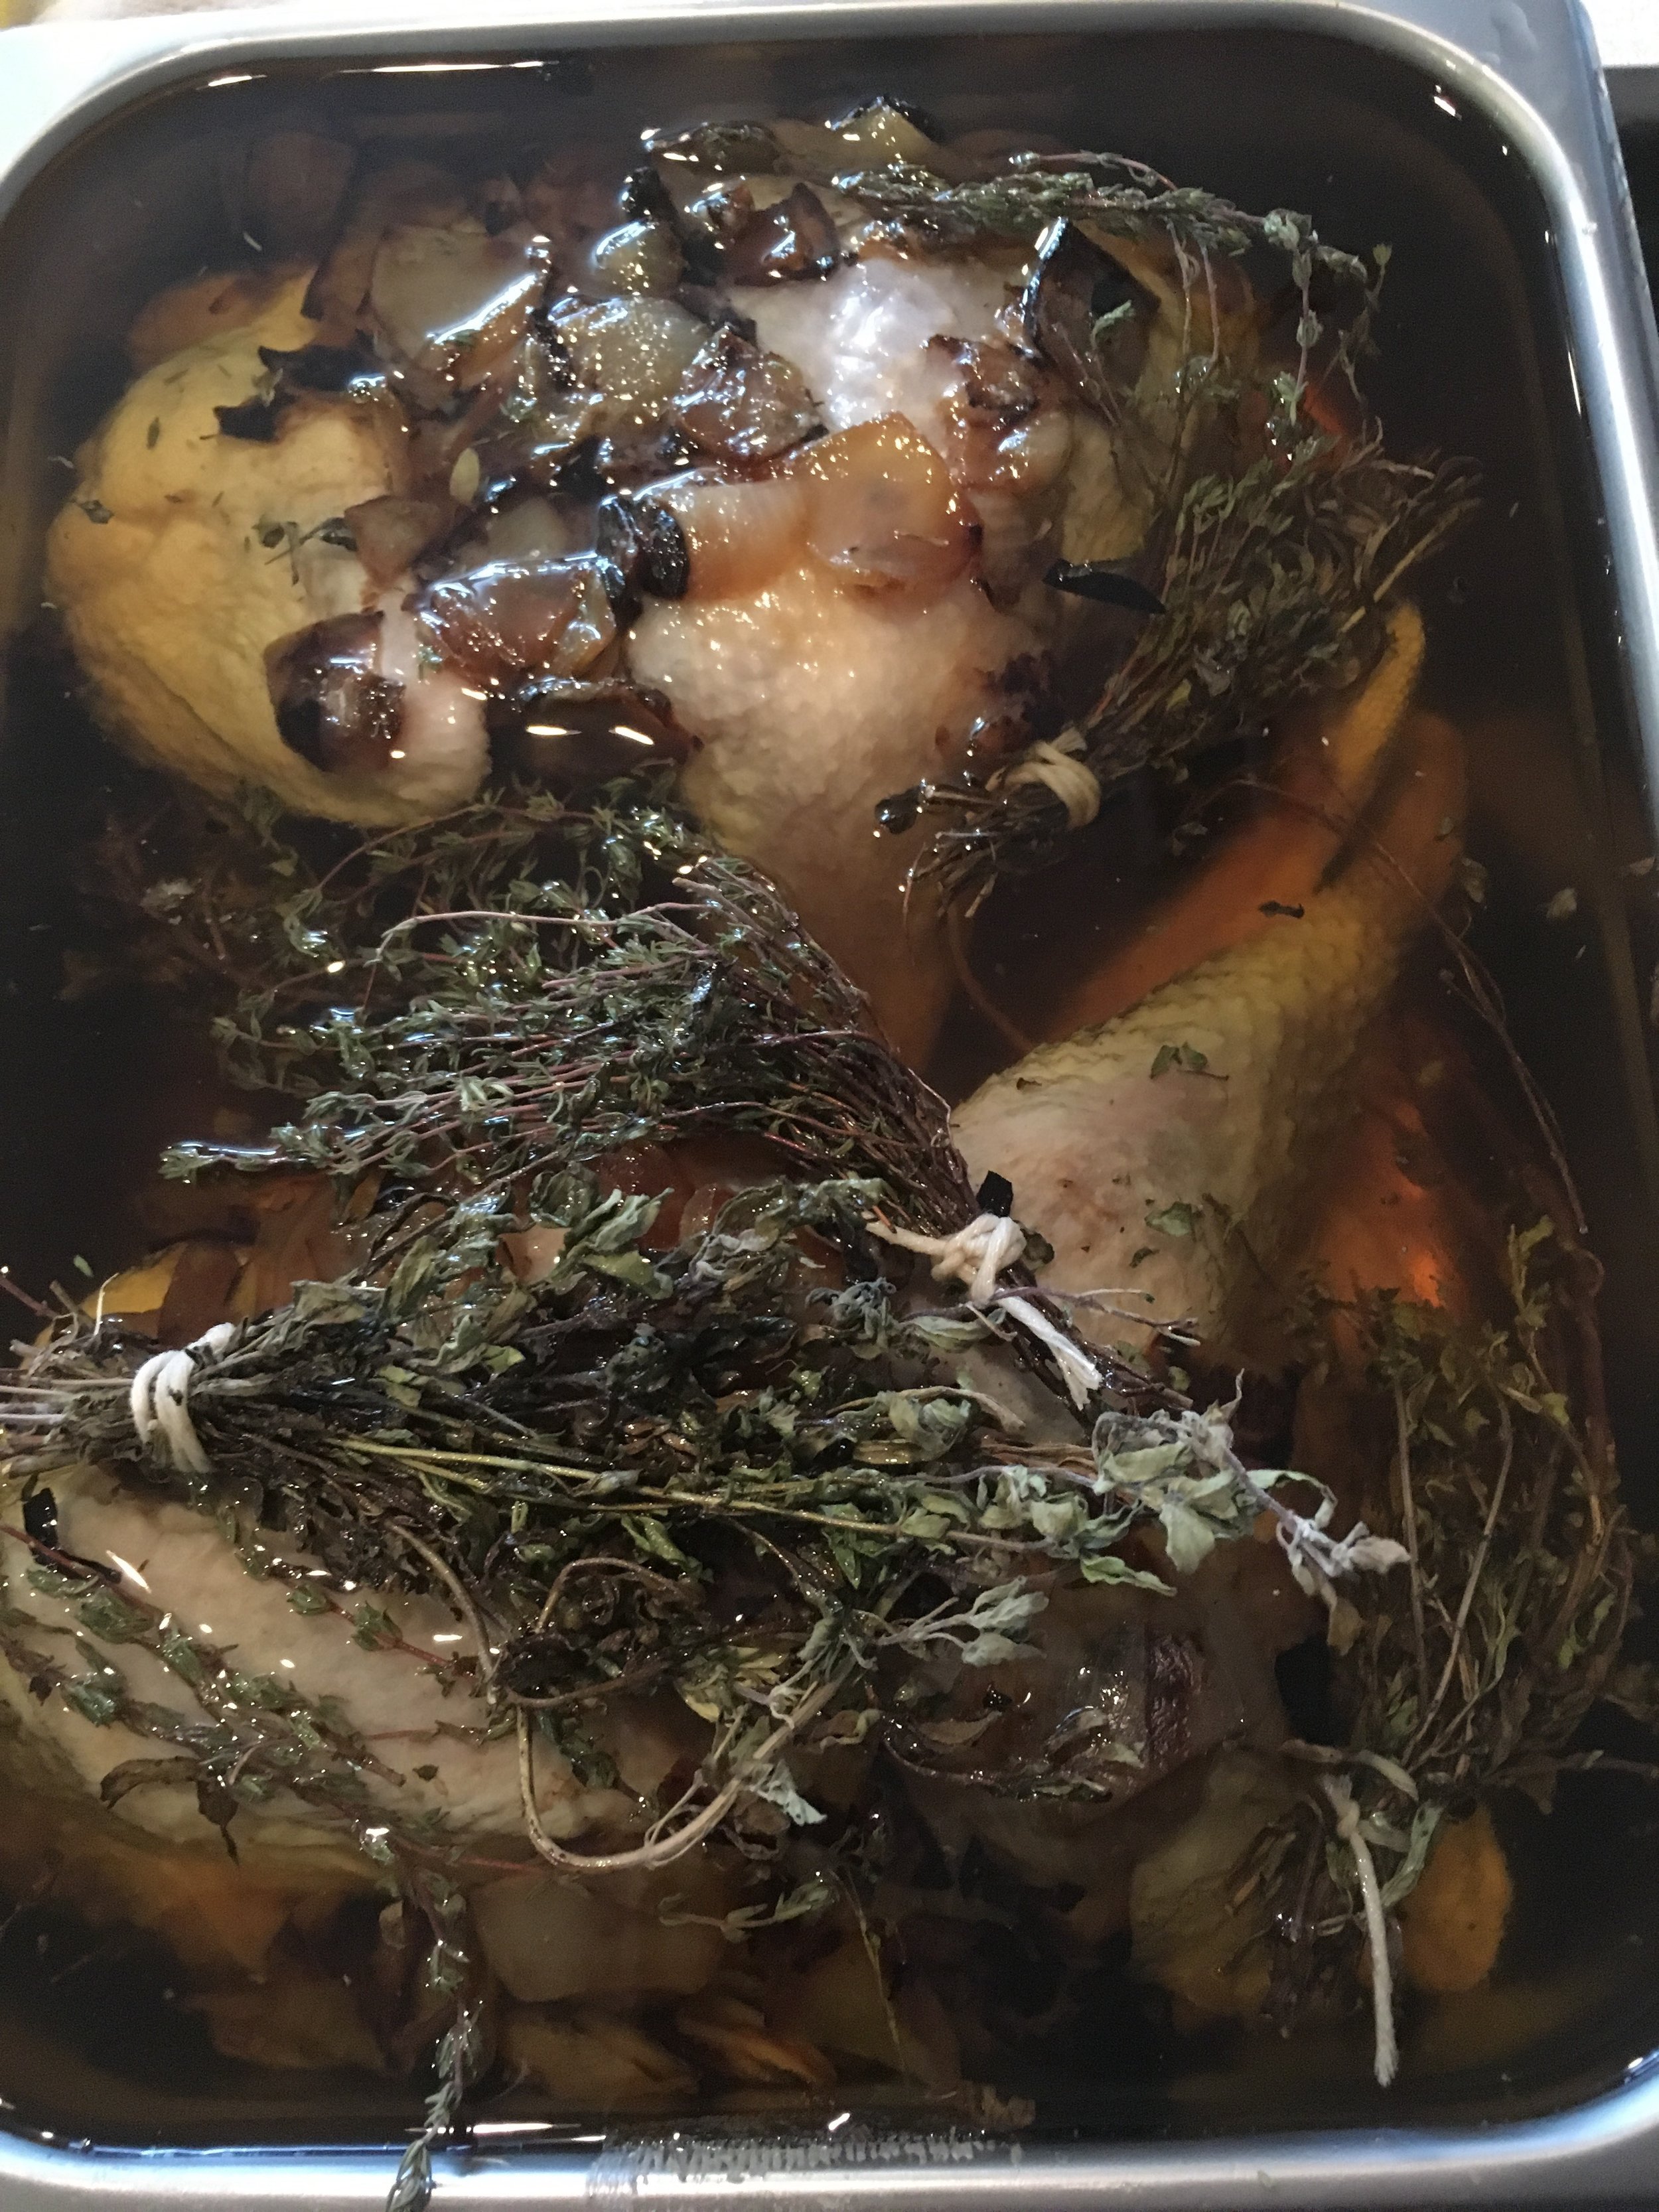
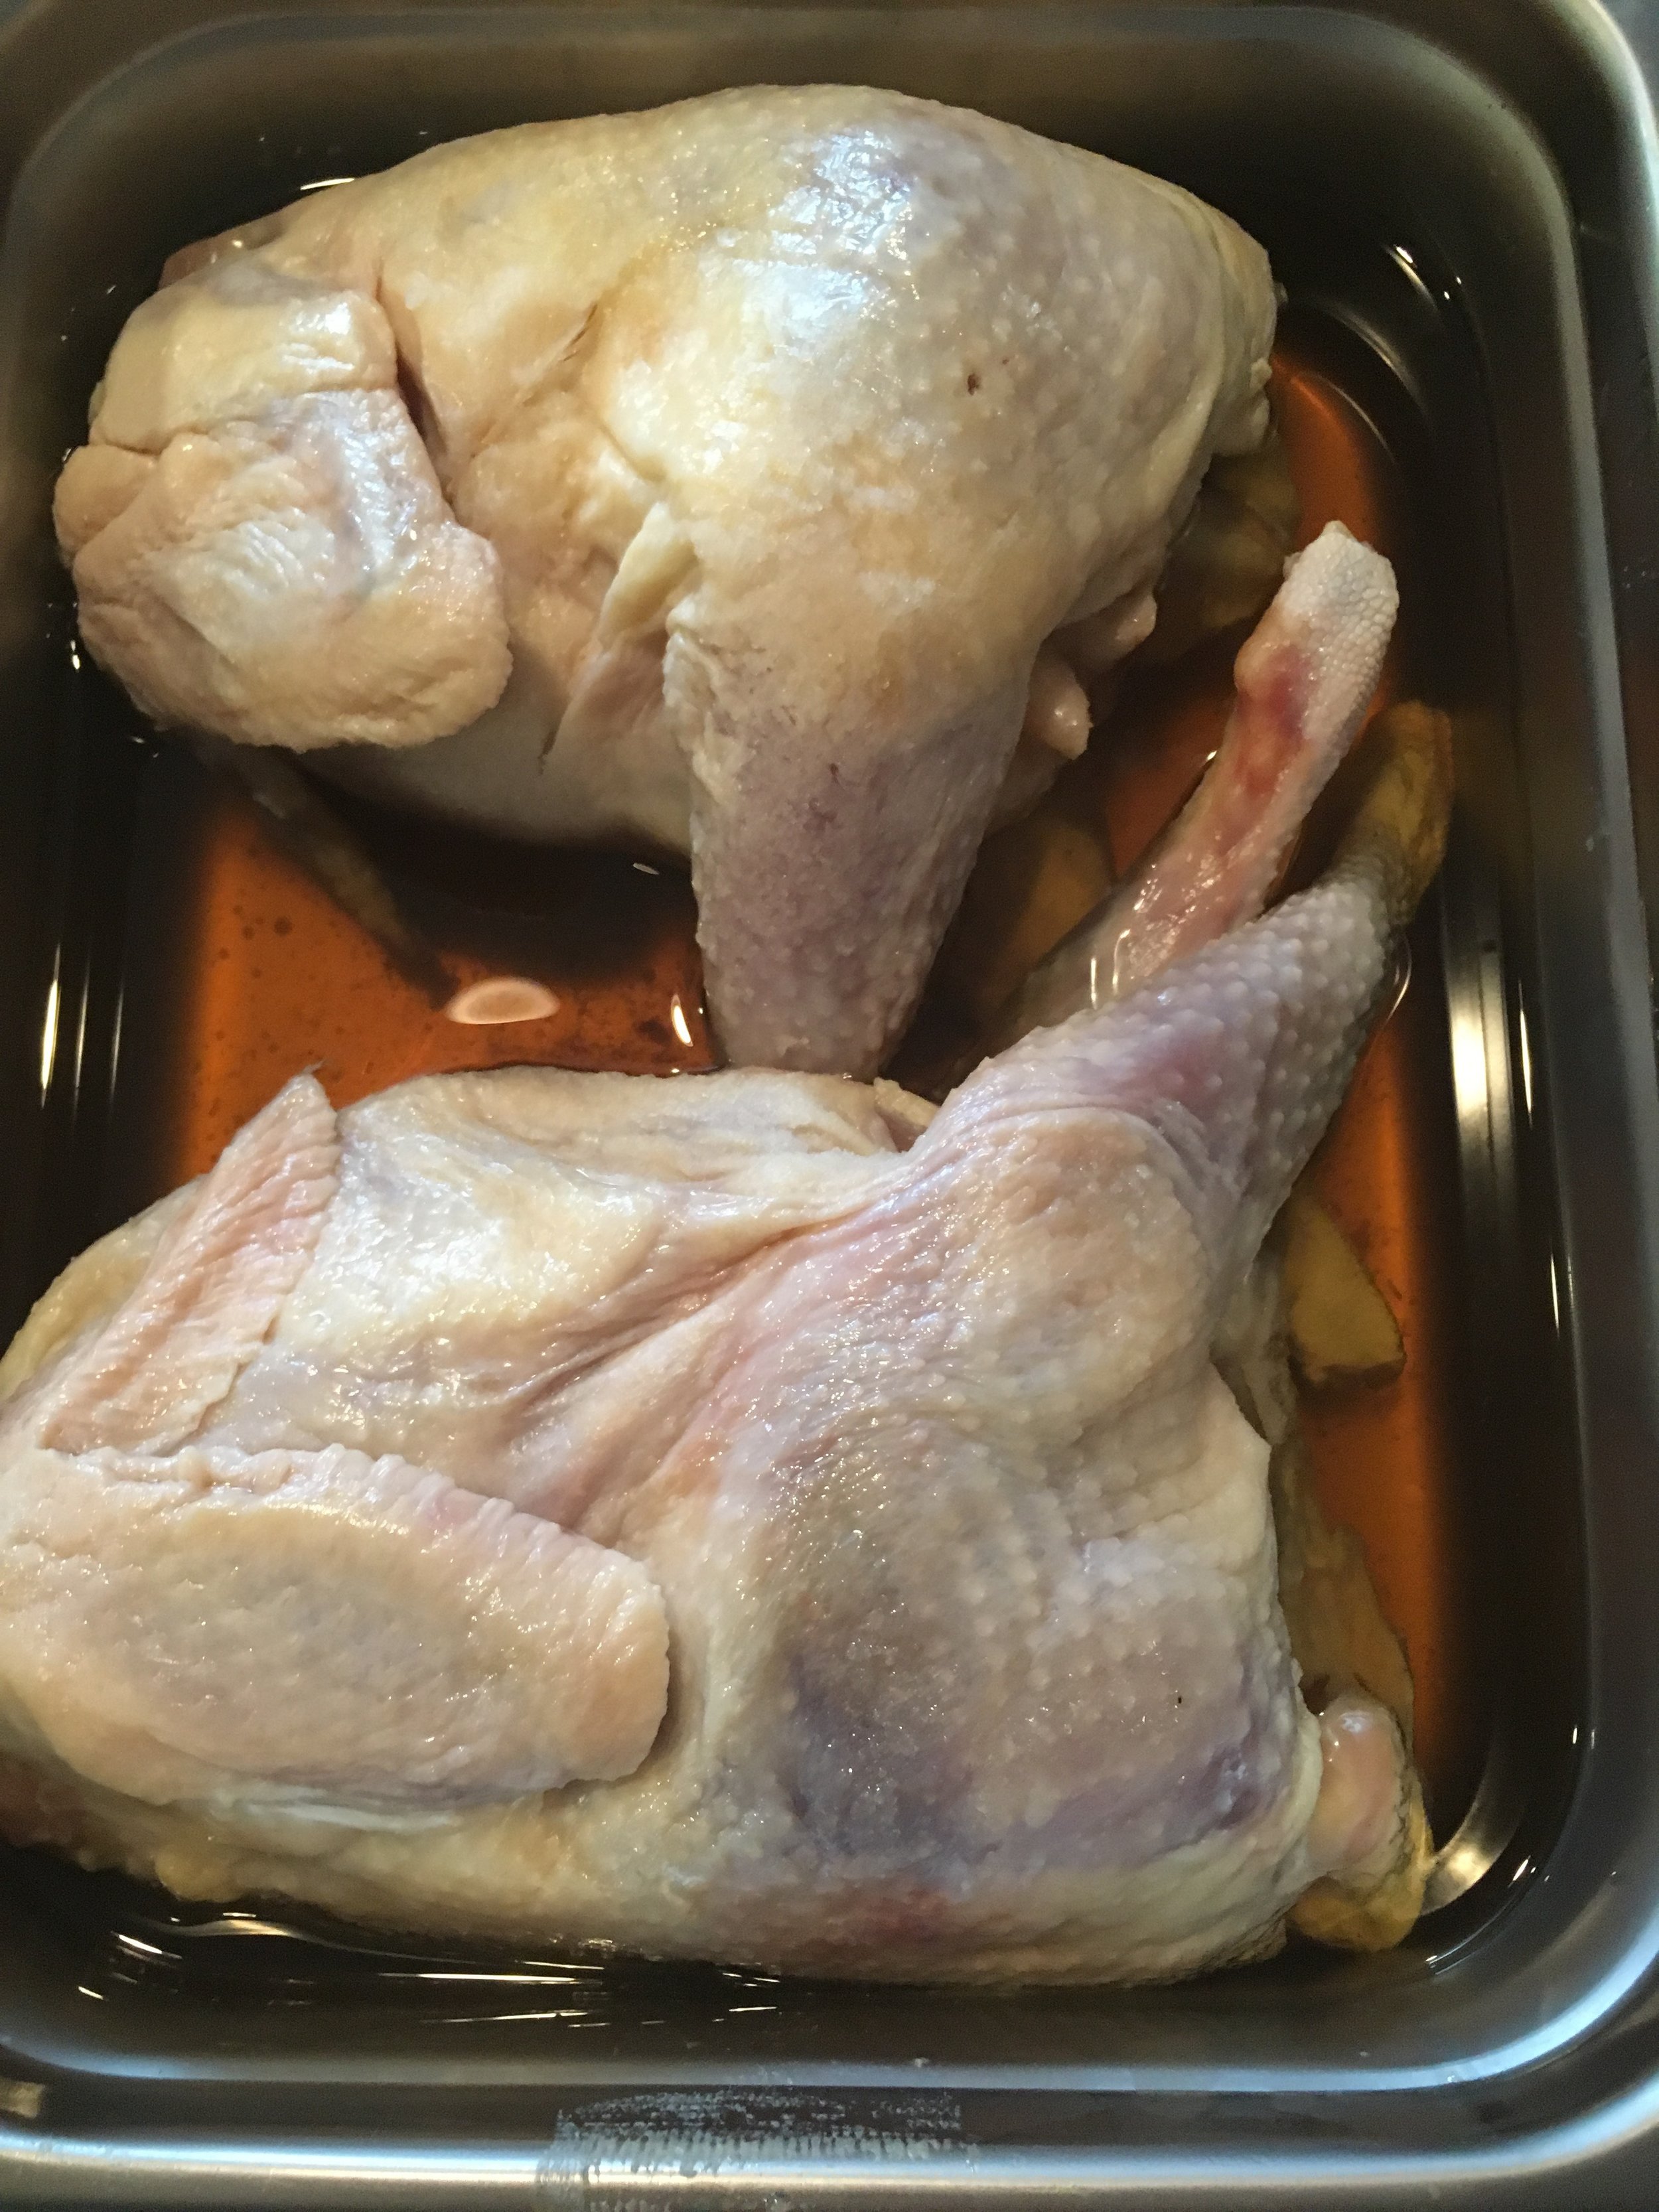
Now this technique can be applied to a wide range of products, but I decided to test it with  stewing hen. These are usually very old chickens, and where I live they occasionally go on sale for very cheap. They are generally a bit smaller and significantly tougher than a normal supermarket chicken, but the flavor is really good. Which is why they are perfect for this technique. The day before I cooked the chickens I applied a super basic cure, just 2% salt and 0.2% curing salt (a.k.a.Prague Powder No.1, pink salt, etc.). On cooking day I set up my two  pan system and set my circulator to 67°C. Then I put two whole chickens into my insert. I mainly did this for presentation and just to see if I could, but honestly I would recommend breaking down your poultry at least a little. Then the chickens were completely submerged in oil. I was using primarily canola oil because it’s what I had on hand, but with a generous addition of some smoked tallow. If you save bacon fat or other drippings, this is a good use for them. For additional flavor I also added a generous amount of partially dried tarragon and some thoroughly charred onions. It’s important that your product is entirely submerged in oil, and I let the chicken cook for roughly 18 hours but it probably could have gone a full 24.

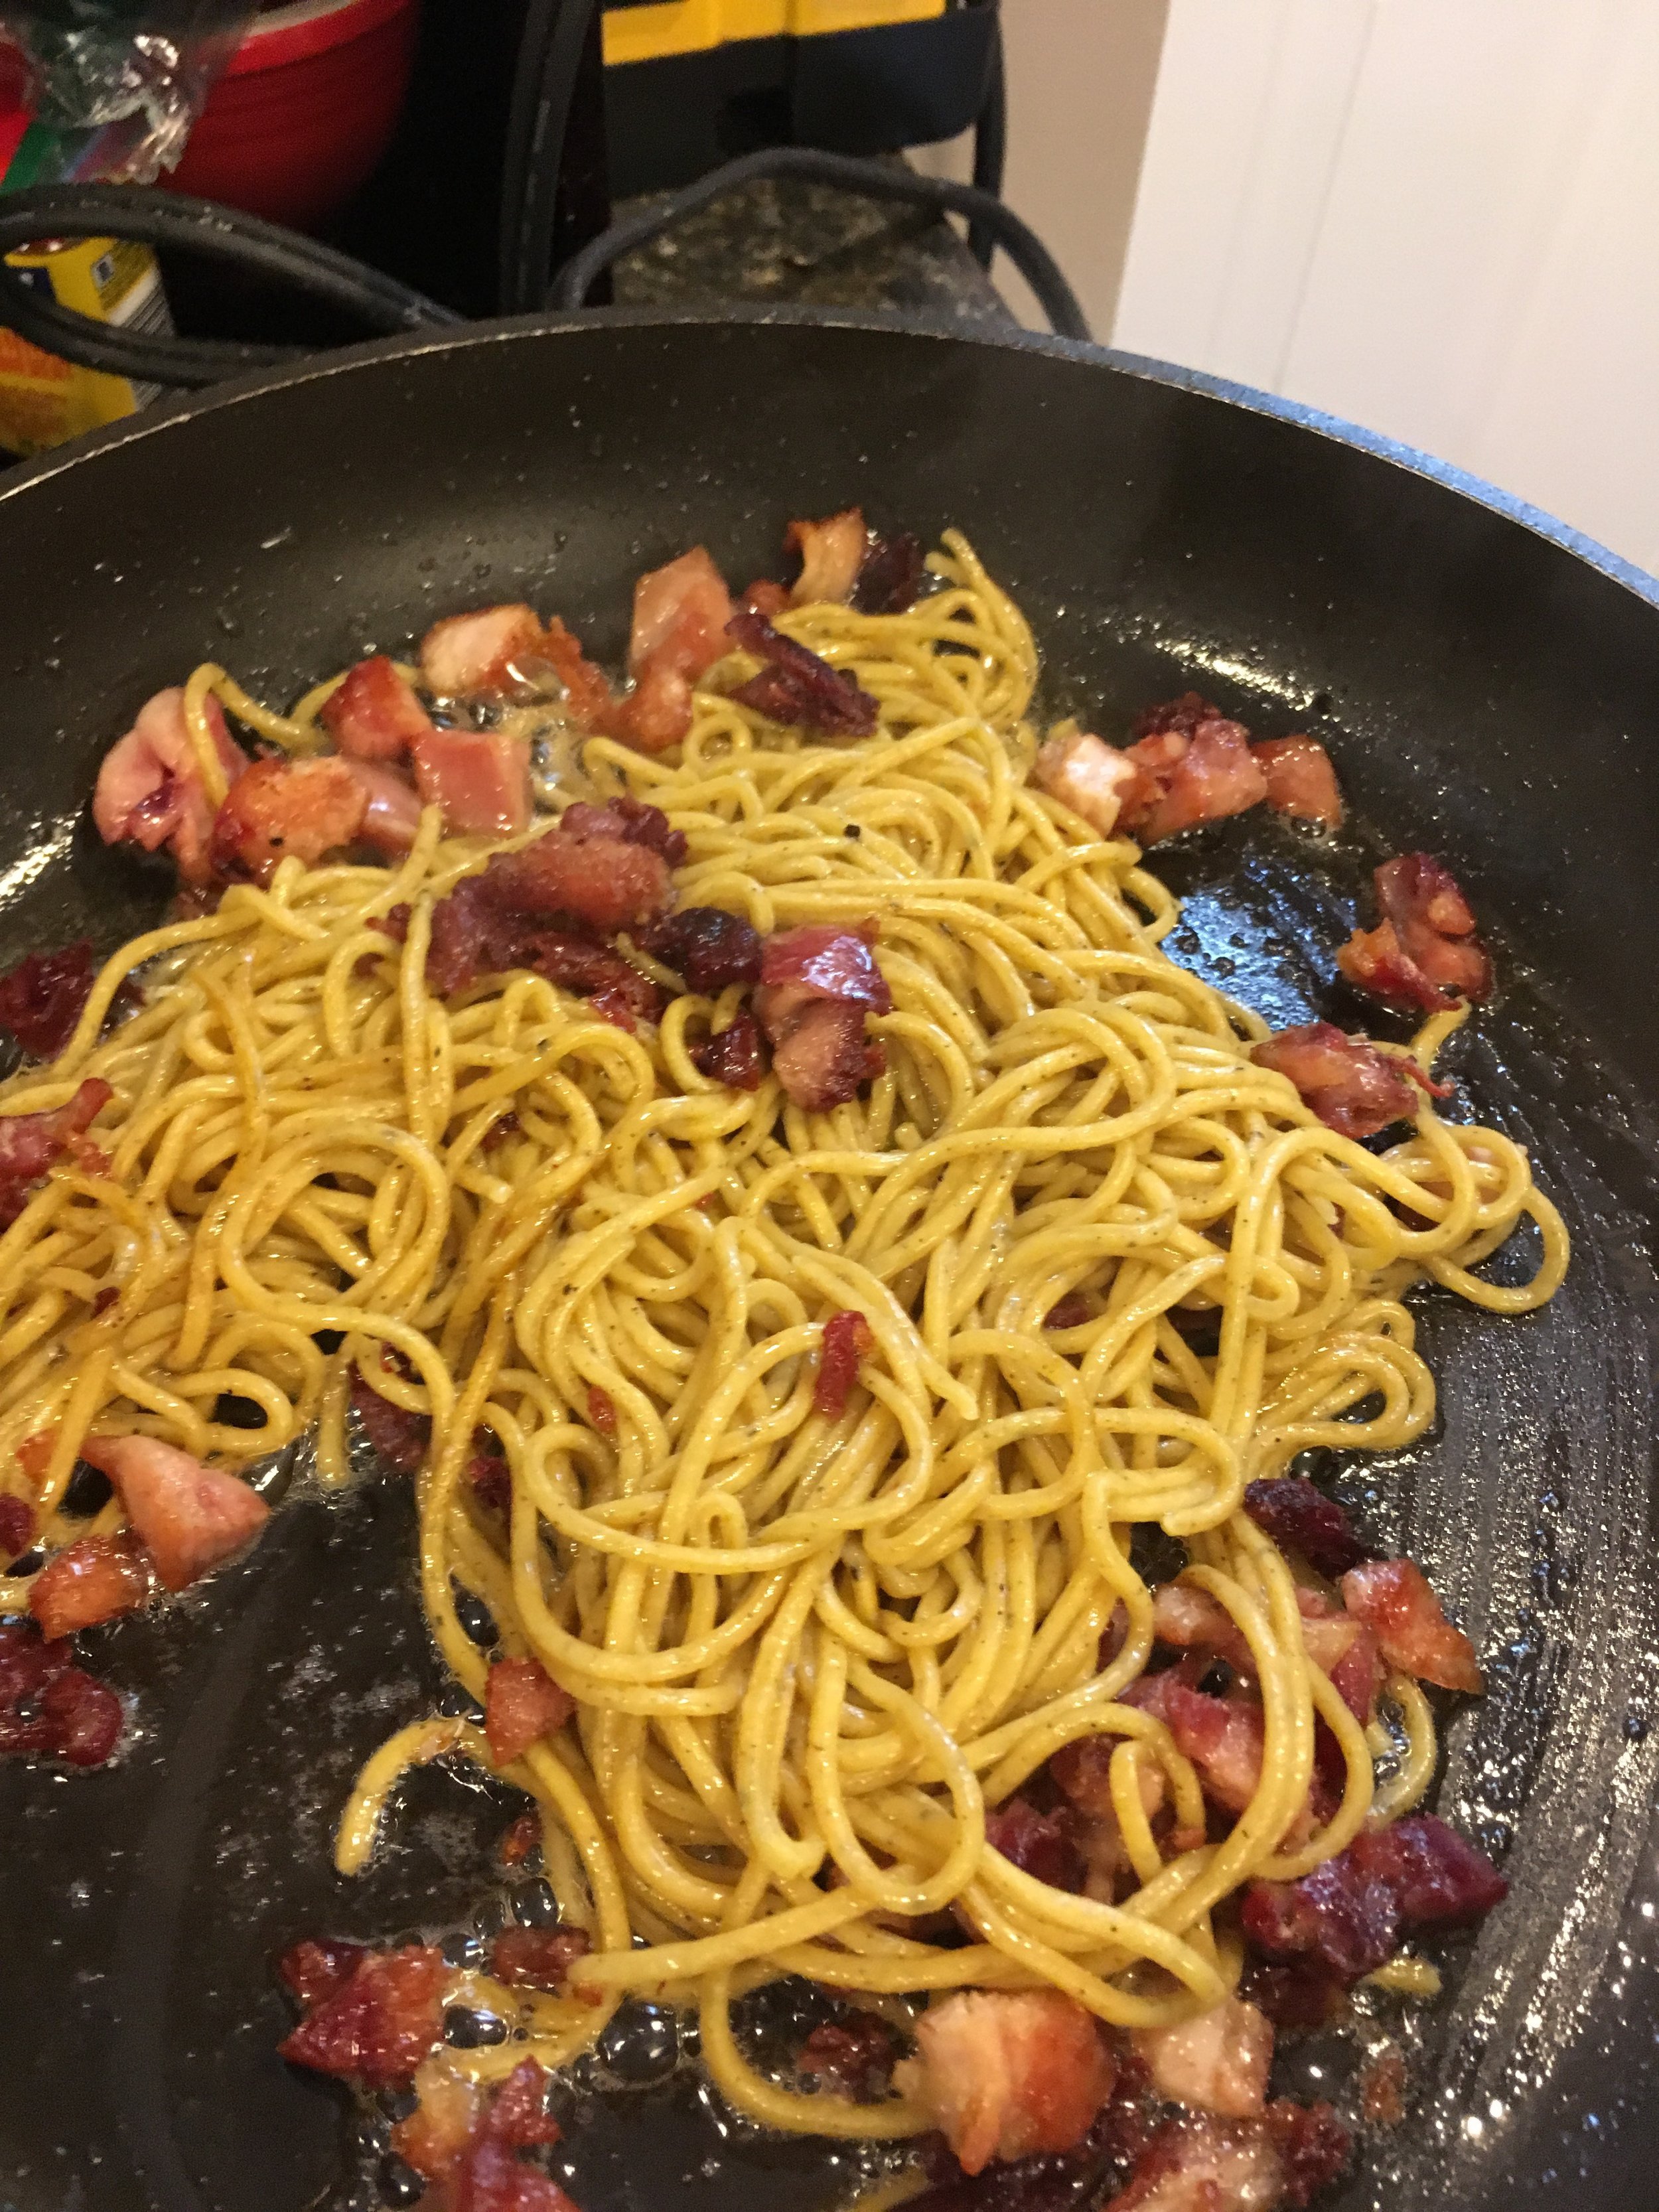
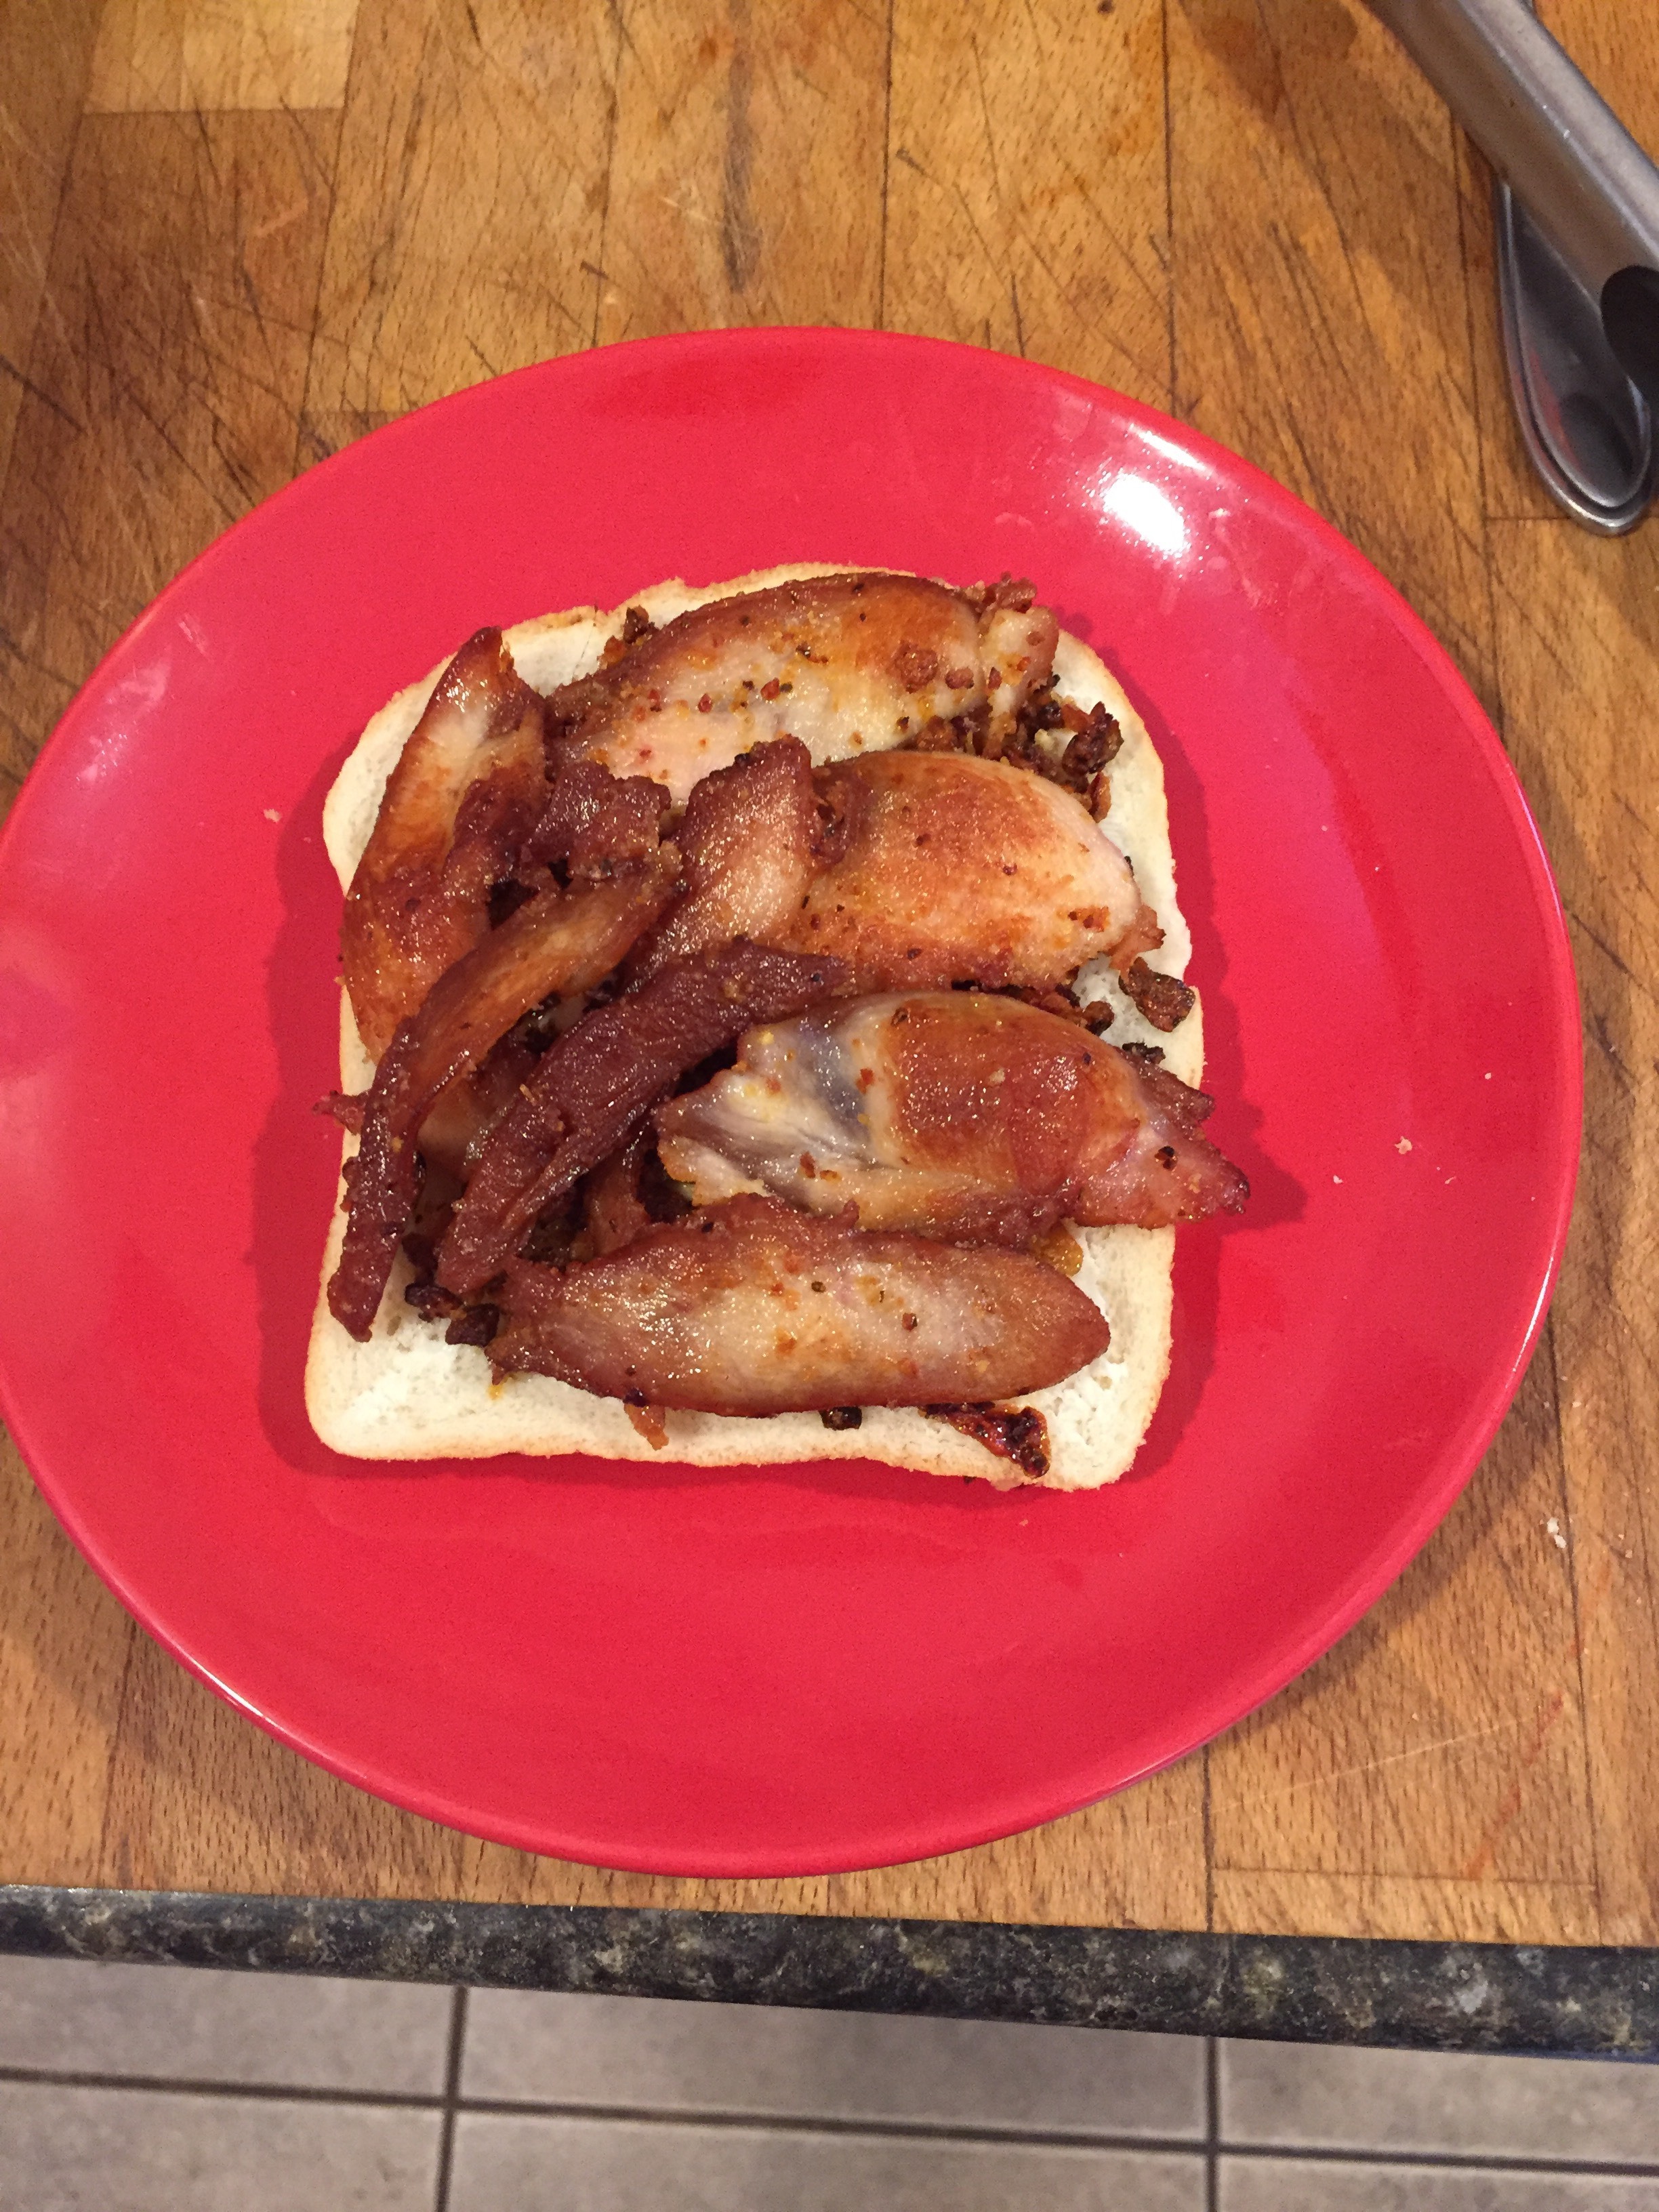
Obviously this cooking time only works for stewing hens because they are incredibly tough. If you are doing any kind of normal chicken I would do 2 hours maximum for white meat, and maybe 3-5 hours for dark meat. In general you can adapt this technique to almost any protein, simply look up a normal sous vide recipe for a guideline on time and temperature (remembering to increase the temperature as necessary for your setup). Overall though the results with chicken are very delicious. It works great as a cured main protein, as a coldcut for sandwiches, even as some crispy charcuterie with pasta. I really like this technique for certain things for two reasons. Certain foods like whole poultry, or anything else with a lot of bones, can be awkward to seal in a vacuum bag. The second reason is flavor. Obviously a vacuum bag theoretically seals in all the juices/flavor, whereas poaching or boiling in water generally extracts a lot of flavor (or causes an exchange of flavor if you are poaching in a flavorful liquid). I think of confit as a nice middleground. Some of the fats and fat-soluble flavors are going to leave your product, but again this can be an exchange. Using flavorful fats and aromatics with many fat-soluble flavors can really build complexity into your final dish. Either way I highly encourage you to try this technique and make sure you save all the fat. I’m going to be reusing the fat from every previous confit to cook the next one. That should build some interesting flavors!

I am excited to explore more of these possibilities going forward.

Coffee Gelato

Recipe Video - https://youtu.be/CG6JJD1HWhg

Ingredients:

  • 165g Coffee Maple Syrup - https://youtu.be/se_mFumNvYM
  • 100g Brown Sugar 
  • 180g Heavy Cream
  • 750g (600-500g used) Whole Milk
  • 80-60g Coarsely Ground Coffee Beans
  • 3 Egg Yolks
  • Salt to taste
  • (Optional) Aromatic Bitters to taste

Equipment: coffee grinder, stove, sous vide setup, ice cream machine.


Start by coarsely grinding your coffee beans and then sifting out any fine particles, any dark or medium roast should work. You want at least 60g of coffee grounds to infuse into 750mL/3 cups  of whole milk. (If you’re making your coffee infused maple syrup directly before making the gelato, you can use the leftover Maple coffee grounds as upto 50% of the coffee grounds used for infusing your milk.) Simmer the milk with the coffee for about 15-20 minutes, tasting until it reaches the desired strength. I recommend infusing until it is almost unpleasantly bitter to counteract how much sugar is in this recipe. Once your milk is at the desired strength, strain it through either cheesecloth or a mesh strainer bag. Your ideal yield should be between 600-500g or mL but if you’re short, top it off with some fresh milk.

While it’s still warm, stir in your brown sugar and your coffee infused maple until everything is dissolved. You can then add your cream and a generous pinch of salt. Taste your ice cream base and assess whether it needs some additional salt (coffee and other bitter flavors can be greatly enhanced with a little extra salt) or even a tablespoon or two of additional brown sugar. Remember that when you’re assessing the balance of your ice cream, sweetness and certain other flavors are going to be very reduce once the mixture is frozen. To add some subtle complexity, I also recommend adding a few dashes of aromatic cocktail bitters, but this is optional. Once you are happy with the flavor, let the mixture cool down a little bit before thoroughly incorporating three egg yolks.

Now it’s time to cook your ice cream base. This can be done by the traditional method on the stove but I highly recommend cooking it sous vide. Place your ice cream base in a jar or heat resistant plastic bag and cook at 65 Celsius for about 45 minutes. You then want to let your mixture cool down to room temperature before placing in the fridge, preferably letting it chill overnight. Then you need to churn your mixture in an ice cream machine until thick and mostly frozen. You can enjoy some of the gelato right out of the machine, but for most setups the texture will be greatly improved by letting the gelato set in the freezer for at least a few hours if not overnight. Once fully frozen you can put it in the fridge for 10 minutes just before serving, in order to make it easier to scoop.

Pizza Flavored Breadcrumbs

Recipe Video - https://www.youtube.com/watch?v=wgtOJbF6ed0

Ingredients 

  • Approximately 1.7L Tomato Juice

  • 5-8 Cloves of Garlic

  • 1 tablespoon Dried Basil

  • 1 tablespoon Dried Oregano

  • Salt and pepper to taste

  • (Optional) Chili Flakes

  • (Optional) Anchovies or a splash of Fish Sauce

  • Between a full or half loaf of bread slices

Equipment: stove, dehydrator.


Saute cloves of chopped garlic (and anchovies it using) in olive oil until fragrant. Add tomato juice, 1 tablespoon dried basil, 1 tablespoon dried oregano, and a generous amount of black pepper. Red pepper flakes can be added, if desired. Simmer the sauce 10-15 minutes until slightly reduced. Cool to room temperature. Dip desired amount of bread slices (plain white bread is recommended) in the sauce, coating both sides of each slice liberally. Set the soaked bread aside, and allow it to rest at least 20 minutes. Arrange bread on parchment-lined dehydrator trays (poke some holes in the paper for airflow) and dehydrate for approximately 24 hours. Break the dehydrated bread into chunks and throw it in a food processor, working in batches. Sift the resulting bread crumbs to make two portions, one fine and one coarse. Coarse crumbs are for topping pasta and whatnot, while the finer crumbs work well as a breading for fried foods like fish or chicken.

You can try using a very low temp oven instead of a dehydrator. However I cannot guarantee results since I haven’t tested that personally and because there's risk of burning the tomato sauce.

White Kimchi Powder

I've seen others dehydrate kimchi all the way to powder, but I thought I would try to streamline the process.

So I started with pretty standard white kimchi ingredients. However, I greatly increased the ratio of aromatics (ginger, garlic, onions) compared to cabbage, carrots and Asian pear. I also went with a dry ferment, 1% salt in a vacuum bag with a piece of old kimchi as a starter.

After a week of fermenting I put everything in the dehydrator for two days. Unfortunately I only have a cheap dehydrator with one setting, so I think it was a little too hot causing some browning. Still the results were pretty good, very ginger forward but not particularly tangy as I hoped. It's certainly superior to store-bought ginger or garlic powder, but I'll probably ferment it longer for future attempts.

Korean Mead - First Racking

After 4 weeks of primary fermentation.

  • OG 1.111
  • Current SG 1.060 - 6.69% ABV
  • Yuzu chunks strained out 
  • Secondary fermentation vessel contains: ginger slices, one Asian pear, zest of one orange 

Orange & Whey Sorbet - Using the byproduct of making Greek Yogurt

I know some people save yogurt or cheese whey for adding a little to soups/stews. But I don't usually have the freezer space for storing it long term, so it's usually thrown out.

For fun I decided to try turning it into sorbet.

  • 500ml Greek Yogurt Whey
  • 500ml Orange Marmalade Syrup (the runny leftovers of a marmalade batch)
  • Pinch of Salt
  • Cap of Vanilla Extract
  • Generous Splash of Orange Liqueur 

The remaining chunks of orange rind where given a quick chop before combining everything and putting it into the churn. For different flavours you could easily swap marmalade for another fruit preserve/syrup that's roughly 50% sugar. Alternatively you could probably use roughly 500ml of fruit juice or puree, with maybe 200g of a sugar.

The results are surprisingly delicious. The intense tartness of the whey was totally mellowed by the sweetness, while still leaving a pleasant yogurt aftertaste. Still could use some development but very pleased for a first attempt. Texture wise I'll have to wait for the overnight freeze, but preliminary sampling suggest it's really smooth for sorbet.

Bourbon Barrel Marmalade (Orange)

This is my first attempt at what will hopefully be a series of "barrel aged" fruit preserves.

I started with standard jam jar sterilization, but I also had my bourbon barrel pieces to consider. The plan is to age each jar of marmalade with a small piece of barrel. To minimize contamination, the wood pieces were briefly soaked in the nearly boiling sterilization water. The excess water was drained off and they were also soaked in a small amount of 95% AVB Everclear. The wood pieces seemed almost dry by the time they were placed in the jars, but my hope is that any residual alcohol will only help flavorful compounds diffuse out of the wood.

As a second flavor booster, I also made some of the marmalade infused with a dark chocolate flavor. I did this simply by pan toasting a small amounts of cacao nibs and placing them in the bottom of three of the jars. Then it was time to simply make the marmalade. In this case it was three regular oranges and one blood orange, thinly sliced on a mandolin. This totaled 635g of orange which was simmered in water for 45-50 minutes, before roughly double it's mass in sugar was added. Once everything was combined the mixture was brought just to 105°C and then portioned as quickly as possible. Each jar was filled about half way before a piece of bourbon barrel was placed in the jar using sterilized tongs. All the jars were then topped up, sealed, and boiled together for 10 minutes. Overall this was the perfect amount for six 250ml jars, with only a small amount of primarily syrup leftover. The consistency is a bit on the thin side but I think this might be ideal for actually allowing the flavor compounds of the wood to diffuse. I plan to let the jars age for at least two months before trying one and seeing what effect there is.